Sunday, September 15, 2013

Chunky Cinnamon Applesauce - Crock Pot or Not - Sugar Free Canning Recipe

Please follow me on Facebook to see new posts!

This applesauce recipe is a delightfully simple family favorite.  We are going through it so fast I am planning another trip to the farm this week for more apples to make a few more batches!

Homemade applesauce is a perfect way to capture that fresh-picked, perfectly ripe, natural sweetness of a fall apple - and enjoy it all year (if you can keep it in your pantry long enough).  You control the ingredients here which lets you keep it simple and sugar free.  And, your house will smell oh-so-good when you cook it!

Yield:  8 pints

You'll need:

12 pounds of apples (about 36 medium) go for organic, local and fresh picked, if possible - I use Galas

Water

4 tablespoons of bottled lemon juice

2 tablespoons of cinnamon 

8 pint sizes jars with lids and bands

A large saucepan or slow cooker

An immersion blender

Kids can help!  Put 'em to work!  Apple picking is a perfect fall family activity, and a great opportunity to teach kids where our food comes from. Letting them help you pick the apples and then help measure, stir and mash is a cool chance for them to understand the farm to table relationship we have (or should have) with our food. 

Get to work:

Put your clean jars and lids on a low simmer, do not boil. 


Get your waterbath canner going so it will be boiling when you are ready.


Wash those farm fresh apples. 


Peel, core and chop them. Sprinkle with an ascorbic acid fruit preserver to keep from browning. 


You can cook them faster on the stove top or slow things down and savor the smell with your slow cooker. 

Put your apples and cinnamon into the pot or crock with some water - just enough to keep them from sticking to the bottom.  

Pot:  Bring to a boil over medium-high heat. Reduce heat and boil gently, stirring occasionally until apples are tender.  (20 minutes or more or less depending on the apple.)

Slow cooker:  Cook on low for two to three hours, stirring and mashing with a potato masher every 30 minutes until apples are tender. 


Use an immersion blender to get the consistency you want. 

Add lemon juice. 

Pot:  Bring back to a boil over medium-high heat, stirring frequently. Maintain a gentle boil over low heat while filling jars. 

Slow cooker:  Cook on high for one more hour, stirring frequently.  Keep your crock on high while filling jars. 


Pour hot applesauce into hot jars.


Leave 1/2 inch headspace.


Remove air bubbles. Wipe rims. Center lids on jars. Apply band until fit is fingertip tight.

Process jars in a boiling water canner for 20 minutes. Remove jars and cool undisturbed for 24 hours.  Check lids for seal and store up to one year.


Enjoy this fall favorite!


Recipe adapted from Ball®. I make no guarantees about its safety. Please see this link to learn about canning food safely:  http://extension.missouri.edu/p/GH1451

Follow all manufacturers instructions for canning jars, lids and bands.  Adjust boiling times as needed for high altitude. 

Thursday, September 12, 2013

Zucchini Stuffed (Bacon Wrapped) Chicken

Please follow me on Facebook to see new posts!

This is one of those - see what's ripe in the garden and what's in the fridge - and pull a recipe out of nowhere kind of nights.

I'm always looking for ways to use zucchini - it's so easy to sneak it in to a recipe and add a veggie that my kids will eat without needing to be coaxed (or begged... or threatened...). They are actually really adventurous eaters - who sometimes turn their noses up at a green bean, but will fight over the last edamame.  By this late in the fall we are all a little bored with zucchini, so here's a way to change it up. 

You'll need:

10-12 boneless skinless chicken thighs, organic and local if possible

One medium zucchini (2-3 cups shredded)

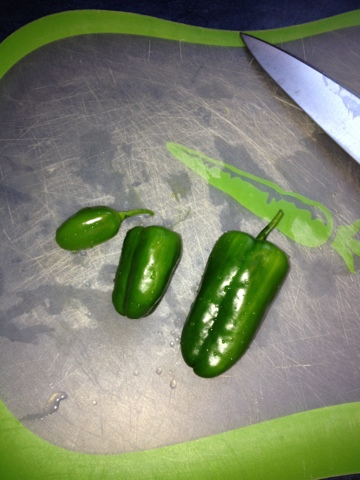
3-4 medium jalapeños (more or less to your taste)

One 8oz brick of cream cheese, softened

Two cups of shredded cheddar cheese

One teaspoon each garlic powder, onion powder, salt and pepper

Two pounds of bacon

BBQ sauce for basting

A food processor

A roasting pan with drip pan


Get to work:

Use your food processor to shred your zucchini. 


Remove stems, seeds and ribs from your jalapeños. 


Use your food processor to chop (not purée) them.  I keep them separate so that I can leave a few pieces of chicken without peppers for those that don't want them - but you can add them in with your zucchini if you don't want to do that. 


Mix zucchini with cream cheese. 


Add cheddar cheese and spices. 


Using this kind of roasting pan will keep the cheesy goodness on top and let the grease drip through.  Spray pan with cooking spray to make cleanup easier. 


Open up each chicken thigh.


Scoop a big spoonful of the mixture into the center of each one. 


Sprinkle on some jalapeños. 


Wrap with bacon. Mmmmmm, bacon. 


Load up your roasting pan. 


Baste with BBQ sauce after 20 minutes. 


Cook another 10-20 minutes, until internal temp reaches 165. I use one of these thermometers that stay in while they're cooking - when it beeps, it's done, so timing is less of an issue.


When chicken is done, baste again with BBQ sauce and place under the broiler for 2-4 minutes to crisp up the bacon.


Share & enjoy!


Tuesday, September 10, 2013

Savor the Summer Salsa - Canning Recipe

Please follow me on Facebook to see new posts!

Tomatoes, peppers, onions, garlic and spices straight from the garden go into this salsa - what a great way to enjoy these summer flavors all year. These make great homemade gifts too.

Kids can help!  Put 'em to work!  My little ones helped pick from the garden, measure, scoop, pour and stir for this recipe.

You'll need:

A waterbath canner

4 pint jars or 8 half-pint jars with bands and lids

A large pot

4 cups peeled, cored, chopped slicing tomatoes (I used half yellow and half red)

2 cups seeded, chopped bell peppers

1/2 cup seeded, chopped jalapeño peppers (protect your skin with gloves when handling & chopping hot peppers)

3/4 cup chopped onion

4 cloves garlic, finely chopped

2 cups white vinegar (5 percent)

1 teaspoon ground cumin

1 tablespoon oregano leaves

1 tablespoon fresh cilantro

1 1/2 teaspoons salt
Get to work:

Put your clean jars and lids on a low simmer, do not boil. Get your waterbath canner going so it will be boiling when you are ready.


Wash those beautiful, fresh veggies. Peel, core & chop your tomatoes. (To make peeling tomatoes easy:  Boil a large pot of water and prepare a large bowl of ice water.  Cut an X into the bottom of each tomato.  Drop in batches into boiling water for 60 seconds.  Remove tomatoes and place immediately into a large bowl of ice water until cool enough to handle. Then grab the skin at the points you cut and slip it off.  It's easier than it sounds, I promise.)


Chop everything up and combine. (I have two bowls because I made more than one batch.)


Combine all ingredients in a large pot and bring to a boil, stirring frequently. Reduce heat and simmer 20 minutes, stirring occasionally. 

Isn't this pretty?


After 20 minutes. 


If salsa is too watery for your taste, drain a little (but bot all) of the excess liquid off.  Fill jars, leave 1/2-inch headspace.  Boil in a waterbath canner for 15 minutes. Turn off the heat and remove the lid from the canner, let jars sit in canner for an additional five minutes. Then remove and cool, undisturbed for 24 hours. Check seals and store up to one year. 


Give some, eat some. Enjoy!


Recipe adapted from the University of Missouri Extension. I make no guarantees about its safety. Please see this link to learn about canning food safely:  http://extension.missouri.edu/p/GH1451

Follow all manufacturers instructions for canning jars, lids and bands.  Adjust boiling times as needed for high altitude. 

Perfect Peach Jam - Canning Recipe

Please follow me on Facebook to see new posts!

As summer fades away, there are few fresh, local flavors I will miss more than a good peach. The little girls love going to a nearby farm to pick them - and are happy to gobble them up!


While you're enjoying fresh peaches, grab an extra sack or two and preserve some. Peaches freeze well and, of course, make good jam and pie filling.

This jam recipe is deliciously simple.

Kids can help!  Put 'em to work!  My girls ate lots of peach peels (which I guess wasn't really helping, but solved the, "what's for snack" dilemma), measured, poured and worked the buttons on the food processor. And, of course they like to eat the jam. 

Yield: 10 half-pints or 5 pints

You'll need:

About 7 cups of peeled, pitted, finely chopped peaches (depending on peach size figure 1-2 peaches in a cup)  Select local, freshly picked, organic fruit - if possible.  Also be sure to use a freestone peach variety - or you'll drive yourself crazy trying to get the pits out. 

5 tablespoons of bottled lemon juice, don't use fresh squeezed

Sugar: for traditional jam 8 1/3 cups or for a lower sugar version use 5 cups

7 1/2 tablespoons of classic fruit pectin

A food processor

A waterbath canner

Saucepans for jam, jars and lids

10 half-pint mason jars with lids and bands or 5 pint jars - or whatever combination of the two you want (I make this recipe several times, using half-pints for gift giving and the pints for us at home.)

Get to work:

Put your clean jars and lids on a low simmer, do not boil. Get your waterbath canner going so it will be boiling when you are ready. 


Wash your peaches, don't soak them. 


Let them sit in a colander to drain while you start peeling. 


Put a pot of water on to boil. While you're waiting, take a sharp paring knife and slice an "X" on the bottom of each peach. 


Drop the fruit, in batches that will fit in your pot, into boiling water for about one minute. 


Using a slotted spoon, scoop them from the boiling water to a bowl of ice water.  Let them cool for a couple minutes, until you can handle them comfortably. 


Grabbing from one of the cuts you made, gently peel the skins back. 


As soon as skins are removed, sprinkle each peach with an ascorbic acid fruit preserver to keep from browning. 


Sometimes the boil & peel method doesn't work for some of the peaches - hit those with your potato peeler. 


All peeled. 


Halve the peaches. 


Drop them, in small batches, into your food processor.


Chop, don't purée them. 


Peach mountain. 


Mix together peaches and lemon juice in a large saucepan.  Stir in pectin. Over high heat, and while stirring constantly, bring to a rolling boil that can't be stirred down.  Add sugar, stir to dissolve. Return to a full boil for one minute, stirring constantly. Remove from heat. 


Skim off any foam. 


Fill hot jars with hot jam, leaving 1/4" headspace.  Wipe rims.  Adjust lids and bands.  Boil in a waterbath canner for 10 minutes.  Turn off heat, remove canner lid and let jars sit in the hot water for an additional five minutes. 


Remove jars from canner.  Let jars cool, undisturbed, for 24 hours. Check to be sure lids are sealed. Store up to a year. Give some away & Enjoy!


Recipe adapted from Ball. I make no guarantees about its safety. Please see this link to learn about canning food safely:  http://extension.missouri.edu/p/GH1451

Follow all manufacturers instructions for canning jars, lids and bands.  Adjust boiling times as needed for high altitude.